With the hopes of decentralizing knowledge power hierarchies and empowering the individual, we will be going through the steps necessary in order to build a device which will accelerate particles into plasma using electricity.
This device will demonstrate basic principles that, when scaled, can be used for more robust (and possibly nuclear) fusion reactions.
I say this because arc-ing plasma through a vaccum will not yield any radiation. However, introducing other gasses into the vacuum chamber can start to produce new atomic compounds through the fusion process, but I havent explored this massive rabbit hole due to budget and timeline.
DISCLAIMER
This device uses high current and high voltage, a very dangerous combination! If you are serious about building one of these devices do more research, get multiple opinions, practice cautious making, and be sure you are comfortable working with glass, high voltage electricity and vacuum chambers.
Basic Components
-Vacuum system
-pump and chamber
-Voltage system
-120-220 AC volts from wall
- ~20,000 DC volts in chamber
-Electrodes
-for conducting electricity through chamber
-Food As a Gas (Fuel)

Vacuum System
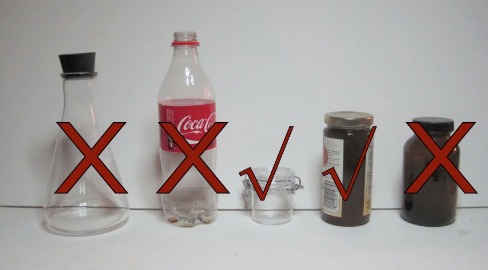
Vacuum chambers can be made from recycled glass containers like wine bottles and mason jars. Plastic tends to collapse on itself under the pressures we need however glass can be dangerous to work with so be careful!!!
Another note on this is I have seen people make chambers out of thick acrylic tubing which is much easier/safer to craft a chamber around than glass, but I would suggest researching this method more on your own before commiting (plastics can yeild strange results when it comes to de-gassing).
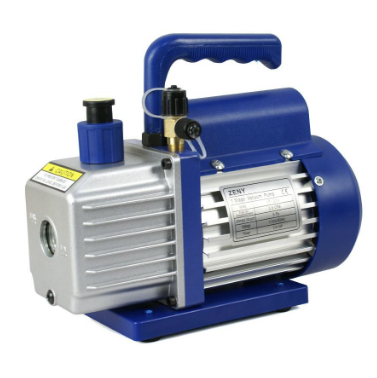
The vacuum pump needs to be able to bring our chamber down to between 100 and 10 millitorr. [1 Torr ~ .001 Atmospheric]
The lower the pressure, the easier it is for particles to move around
I borrowed a pump from a friend who was using it for removing air bubbles from silicone casting materials. It works fine for my needs and cut my spending in half [the two most expensive elements to this system are the pump and the variac]
I have seen some systems use multiple pumps to get the pressure down even lower but for my needs the system stated above is fine
Building the vacuum chamber
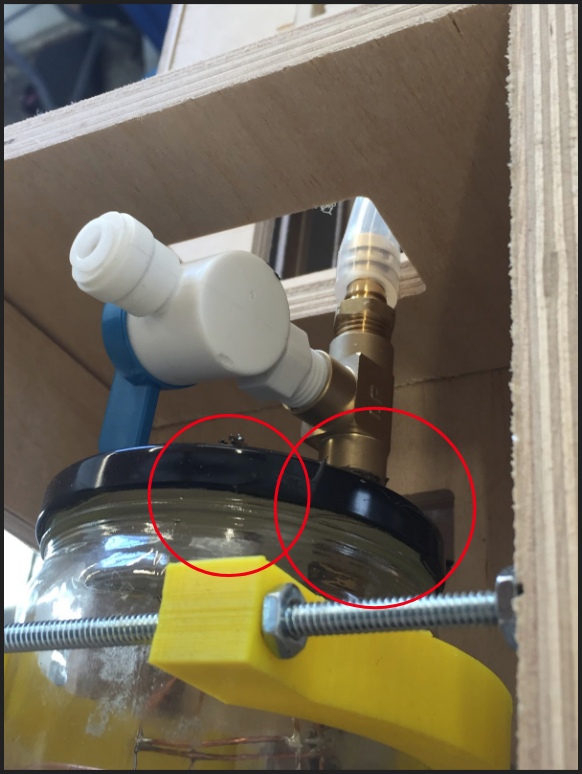
For the chamber, I needed 3 holes drilled
One for the cathode (this one will be in the glass so be careful!)
One for the vacuum pump adapter
One for the anode
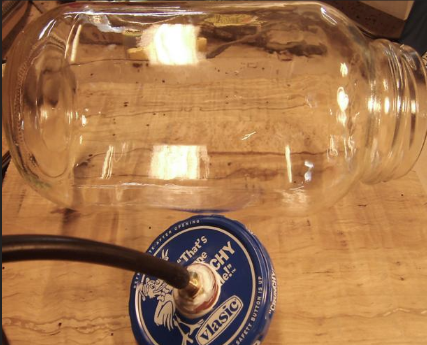
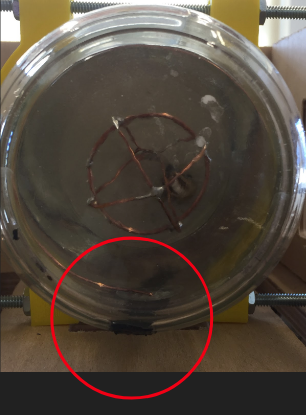
For my chamber, I used a small glass salsa jar I recycled. It had a metal lid which I drilled the vacuum adapter hole and the anode hole into.
In order to seal everything up I used JB Weld [a two part epoxy which has been refered to me as the "duct tape of the vaccum world"]
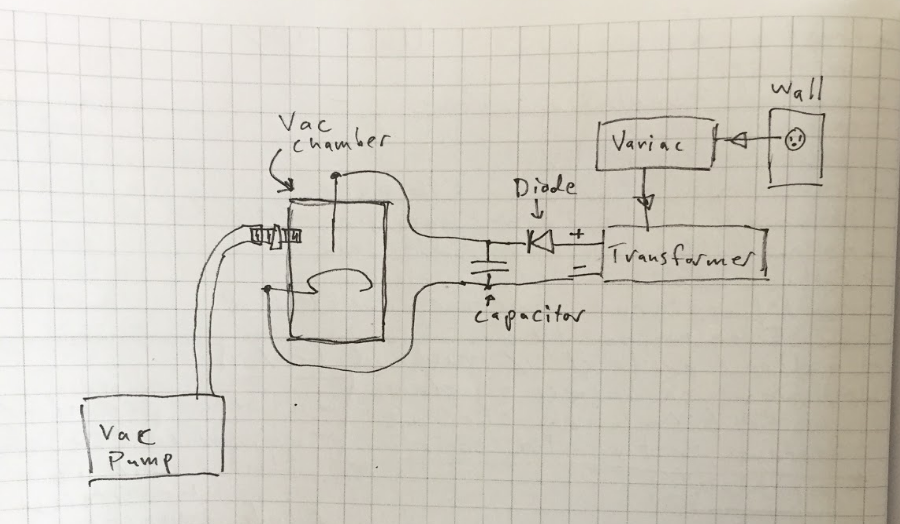
Voltage System
Using a microwave transformer, we can step up the 120-220AC volts from a wall socket to about 2,000 volts with a minor loss of current [a wall socket provides enough amps that we dont have to worry about the drop in current in the transformer].
The alternating current (ac) provided by the wall can be converted to direct current (dc) using a dymond of high voltage diodes. These can be sourced from multiple microwaves or bought in bulk online.
When I first built this system, I tried a circuit with a capacitor from the microwave as witnessed in a video. For me, this circuit only produced arcs which, while still very exciting, didnt emit the plasma I was after. After ditching it and trying a new diode setup I had much better results. [NOTE: capacitors can still hold charge so make sure you ground them before touching!]
How to control the voltage
In order to control the voltage from the wall we need a variable system called a variac. However, these can be expensive and hard to find so we will use an alternative called a scariac
Two copper plates suspended in a tub of baking soda and water will work just as well By putting one of the susspended copper pieces on a hinge, you can move it towards the other and increase the output voltage (don't touch the copper! Clamp it to a stick or something. I drilled some holes into some scrap plywood and mounted the entire setup on the tub).
Some advice: When I was trying to find a cheaper alternative to a variac, I thought a dimmer switch could solve my problem! On principle, a dimmer switch seems to limit the amount of electricity flowing to a light bulb or device, so why not use it to control the output of electricity to my transformer? THIS WILL NOT WORK! Here is a great videothat explains the difference between a variac and a dimmer switch.
Before plugging anything in...
Always have a fail safe!
Emergency switches should be easily accessible
A system of multiple checks can lead to a safer practice
I like to use power strips with switches built in. Some of these have fuses that could pop if you draw too much which is a nice and cheap failsafe.

Wire everything up
Plug in your vacuum pump and connect to you chamber
Plug your transformer into your variac
Attach the diode and capacitor to the secondary on the transformer
Connect the positive output to the anode and the negative output to the cathode from the diode converter to the vacuum chamber
Plug your variac/ scariac into the wall.
Testing the System
After making sure all connections are wired correctly, we can turn on the vacuum chamber and wait for it to reduce the pressure inside the chamber (for me this took about a minute).
If the pressure doesn't drop, you have a leak (in some cases you can hear the leak)
Once this is done and you chamber is at the propper pressure, we can turn on our high voltage system and slowly increase the power until our anode begins to glow.
Improvements
Vacuum system improvements ---> Vacuum chamber is pretty makeshift. Minor leaks leave more material for particles to move through
Electrical systems improvements ---> Could use a variac for a more reliable current management
Gas as food/ fuel? ---> Adding gas into the vacuum will allow for different outputs that push this system past a simple light show.